Cheap and Easy Card Dispenser for Zombicide!

I recently backed Zombicide: Undead or Alive at an almost All-In pledge level, because I expect it to be the best Zombicide experience I had thus far (I only ever played Invader!), due to the mix of weaker weapons, tougher abominations and an emphasis on mobility over combat, that makes this game sound like a real challenge!
It does have one major downside, however: The enemy variety. Zombicide: Invader spoiled me with it's 4 new enemy varieties, in addition to the standard 4 - Walker, Runner, Fatty and Abomination. Among the new additions are the fast-moving and melee-resistant Xenomoths, the unpredictable Seeker Workers, the projectile-flinging Flingers and the fast, durable and strong Driller Blitzers. These add massive gameplay value to my Zombicide: Invader sessions and I cannot imagine the game without them.
Zombicide: Undead or Alive, however, only has 1 new enemy: the Long-Dead Walkers. An enemy immune to ranged damage. To mitigate this lack of variety, I will be making use of the Zombicide franchise's modular structure and mix the 4 new Invader enemy types into the Undead or Alive deck, thus improving the enemy variety greatly. Which leads to one problem: How do we keep the surprise of what enemy we'll fight next, if we can see the back of the card on the top of the spawn deck? For example, if we see Invader artwork on the top card of the spawn deck, we'll know that a special Invader enemy will spawn next turn and so can prepare better. So how do we mitigate this?
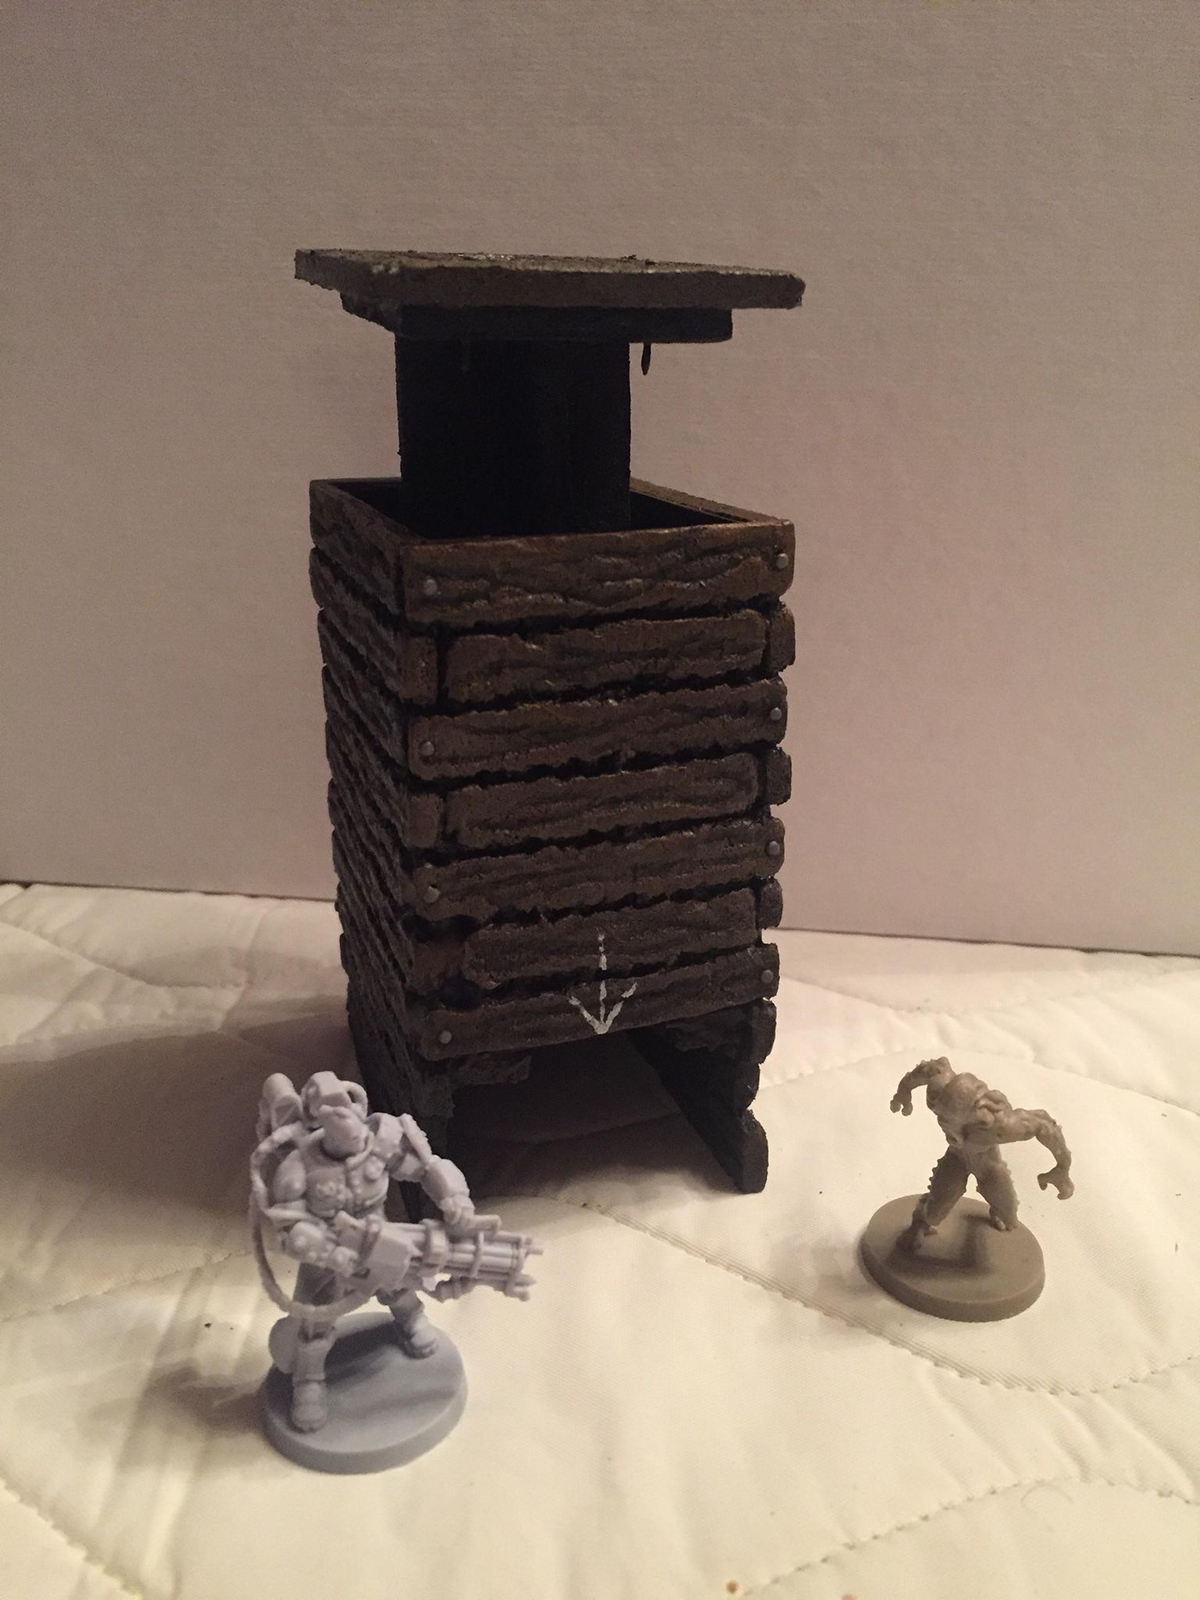
A bottom-drawing card dispenser, therefore, is the solution! I conceptualized a few designs, but this one seems best for the job:


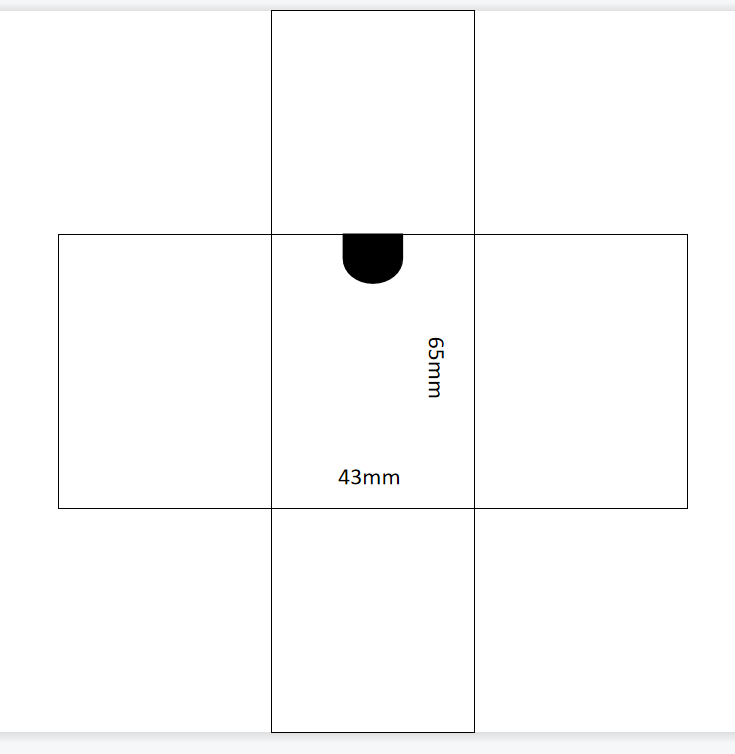
And that's it! Below is the template (not the actual template I used, but the dimensions are accurate). You want to aim for about 2mm larger than the 41mm x 63mm size of the spawn cards. Go larger if you want less resistance when drawing cards and account for sleeves.
Just draw the below template onto cheap cardboard and cut! I used a cracker box.
The front flap should be cut off and shortened by 2mm, and then taped to the frame so that cards can be drawn from the bottom, as in the photo above.
Knowing that the template works, I wanted to improve the visual appeal and try out a material that I have never used before - Dollar Store foam board. It's cheap, easy to texture and the paper peels off easily. Black Magic Craft on Youtube gave me some great ideas on how to work with foam board and paint it with a sealant to help maintain rigidity.
I traced out the template for the wall panels on the foam board and then cut them out using an exacto knife. The dimensions are equal to the cardboard insert, plus 4mm on either side, as this is the thickness of the foam board. The height is up to you - mine are approximately 12 inches high.

I then indented the outline of the wood planks using a sculpting tool, although a toothpick or skewer will work just as well. Each plank measures 5mm wide. Each second plank is cut 4mm on either side. This allows for us to slot the panels into each other!
For detail, use the toothpick, skewer, or sculpting tool. Just carve lines into the foam to create the texture.


It should fit together nicely like this. Now, you may glue the pieces together using white/PVA glue. I used tiny nails because I have them available and they look cool, but they honestly aren't necessary.
I also discovered that hot glue melts foam. The more you know.
If the measurements are correct, then the tower should look like the photos above and the cards will slot in very smoothly.

And this is where I made a big mistake: I glued the cardboard frame into the tower. It made the inside look smooth and since the fit was tight and worked, I thought that keeping it was a good idea. I was wrong because thin cardboard warps when painted.
I applied Black Magic Craft's signature primer that is made by mixing Mod Podge and black acrylic paint (both from the dollar store), and then this happened:

The sides warped inward. I managed to mostly glue them back to the walls of the foam tower, but really removing the insert entirely would have been preferable.
This little fix certainly helped, but it wasn't enough. The cards no longer slide in as smoothly as they did and sliding them out from the bottom is now a chore. I remedied this by enlarging the dispenser slit at the bottom with a small file and applying a small amount of pressure on the cards from above, to force them down.
While practical, this didn't look very appealing, and so I created a lid and stem that can be pushed instead.


I created templates for a stem that could be pushed down from above. It is made in two halves that slot into each other and has a wider bottom, for improved stability at the base.
At the bottom of the stem, I glued on a 41mm x 63mm piece of dollar store MDF board to add additional weight and help keep it upright:

After that, it was just a matter of texturing and painting it in the same manner as the rest of the tower:

...and that's it! A cool, thematic card dispenser for Zombicide, which allows you to mix cards from different Zombicide games together and still keep each spawn a surprise!
To reiterate, the cardboard template is enough for functionality - the foam casing is simply cosmetic. If you do want to make the whole tower, be aware that the cardboard template will warp and so should not be used in the tower itself - don't do like I did. You can still make a lid if you want (although pushing down on the cards will not be necessary!) but this would be purely cosmetic.
Enjoy!